What do the Pace Zones Mean? (In Zone, Near Miss, Building)
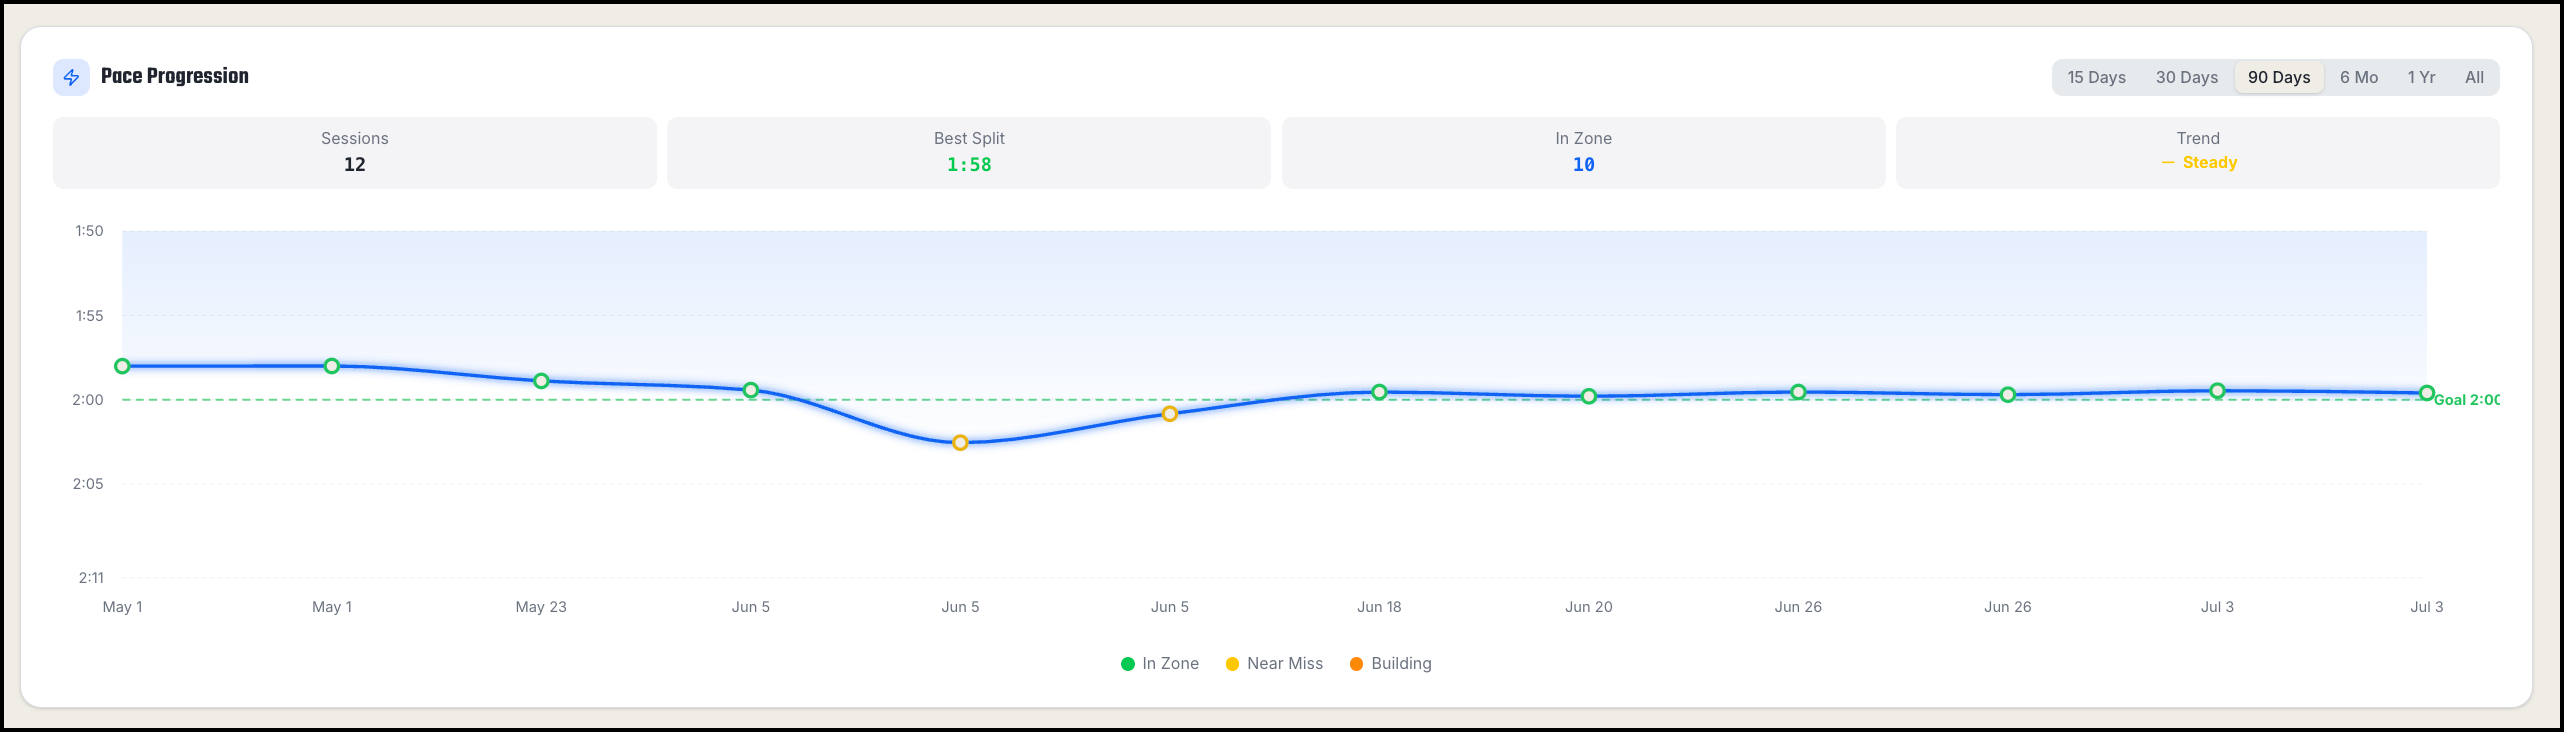
Every workout on your dashboard is color-coded into one of three pace zones. The zones are based on your average pace per 500m compared to your personal pace goal — so they're unique to you, and they update automatically if you ever change your goal.
In Zone (green)
Your average pace was at or faster than your goal. If your goal is 2:00 and you row a 1:58.5, that workout is In Zone. These are the sessions you're chasing — your dashboard counts them, and your In Zone total is one of the fastest ways to see your progress over time.
Near Miss (yellow)
Your average pace was within 5 seconds of your goal. Against a 2:00 goal, that's anything from 2:00.1 to 2:05.0. Near Misses are a good sign, not a failure — they mean you're knocking on the door. A cluster of yellow sessions usually comes right before your first green one.
Building (orange)
Your average pace was more than 5 seconds over your goal. These are your base-building sessions — longer, steadier rows where you're developing fitness rather than chasing a number. Every rower needs them. A healthy training log has plenty of orange in it.
Where you'll see the zones
The zones appear everywhere on your dashboard: as colored dots on your Pace Progression chart, as colors on the Efficiency chart, and as labels on each workout card. Hover over any dot on a chart to see the exact pace and zone for that session.
Your goal tracker at the top of the dashboard also tallies your sessions by zone.
Spicy counts your sessions more than 5 seconds faster than your goal — the rows where you didn't just hit the target, you blew past it.
The zones follow your goal
The zones aren't fixed at 2:00 — they're always relative to the pace goal that you selected. Change your goal from 2:00 to 1:55, and every workout re-shades instantly against the new target. A session that was In Zone yesterday might show as a Near Miss today, because the bar moved, not because you got slower.
How to use the zones
Don't aim for all green. If every session is In Zone, your goal is too easy — move it down. If everything is orange, pick a friendlier goal and work back. The sweet spot is a mix: mostly green and yellow on your harder days, orange on your long steady days.